Showing posts with label remove. Show all posts

Saturday, 14 July 2012

Download Windows Password Remover [ISO]


Windows Password Remover1Windows Password Remover a software to reset lost Windows administrator and user passwords . In short you can access any of the supported operating system without having the password. It supports passwords of all Windows versions, viz. , Windows 7, Windows Vista, XP, 2008, 2003 and 2000, etc.


Steps :
  1. Burn the given iso to a CD.
  2. Boot from the cd.
  3. Wait untill it asks any thing from you (Some time).
  4. Go according to the onscreen instructions (very simple) and reset the password.
Download Windows Password Remover ( ISO File – 9 MBs )

Wednesday, 11 July 2012

How to Bypass or Remove Survey from Any Website


bypass-surveyInternet is full of crappy websites providing you something you which to have with some limitations, many people upload content on survey generated websites which when passed you will get link to that file and they will earn money, but the real deal is that those websites simply does not work. Either they will say that survey is not completed or survey not available in your country. So we found an interesting survey bypassing or removing JavaScript which can do your job quit perfectly.

See Supported Websites and Get JavaScript Codes :


You can check out list of supported survey websites for which this JavaScript will work and now you just have to grab those JavaScript codes here and than when ever you visit any of the above listed survey website just copy any one JavaScript code and than paste it in your URL section and that’s it done.

Things you should be aware off :


You must have a JavaScript enabled and browser should be compatible, well now days every browser is compatible so make sure its updated. Now this may work or sometimes may not the real deal is that we haven't tried it yet and we are just providing you with the source code so try it out if you find any difficulties make sure to comment below.

Remove Write Protection on USB Drive & Memory Cards

write-protected-driveMany times using your portable devices you get errors like  the disk is write protected like in the image on the right hand side. So this can happen anytime due to virus attacks or anything can be the cause. There are two ways you can try to remove its write protection so check them below.
Firstly I will recommend checking for any physical lock on that card or USB, because many times company’s provide a lock write attached to the card for making it write protected, so check that up make sure its off and than also if you are not able to copy stuff to your card than follow below methods.

Removing Write Protection Using Registry Editor :


Well this is most preferred way of removing write protection as it does not include any formatting of disk or memory card. So you just have to manipulate a .reg key and that’s it.
1. Open Registry Editor by navigating to Star Menu > Run ( on windows 7 search for Run in start Menu ) now type “regedit” and you will see your Registry Editor opened.
2. Now Navigate to the following path :
HKEY_LOCAL_MACHINE\SYSTEM\CurrentControlSet\Control\StorageDevicePolicies
Now if you are not able to see the StorageDevicePolicies than no problem just download this.Reg File and double click on it, now restart your computer and you will have Storage DevicePolicies.
3. Now double click on the WriteProtect and make its value 0 and than click OK.
4. Now just close registry editor and restart your computer for changes to take effect, now plug your memory card or USB in and enjoy non write protected memory card.

Removing Write Protection Using Apacer Formatting Utility :


Now if you are not able to remove write protection from your Memory Cards or USB Drives using the above method than you can go for Apacer Formatting method which simply works quit good.
Now this method needs your card or USB Drive to be formatted so make sure that you have copied all the data from your USB Drive to your computer, now follow steps from below and have fun.
1. Download Apacer Formatting Utility to your computer, make sure its not kept inside the USB Drive just keep it anywhere outside where you can remember.
2. Now extract it and than plug your pen drive or memory card in to your computer and than double click on the Start.bat file present inside the folder you just downloaded. Now this step will start formatting your drive or card so let it do its work till you figure out that formatting is done.
3. Now try checking out if your card has been free from the write protection, well this will surely do its job and you can enjoy copying any files or folders to your drive.
So now these two methods will help you in fixing your USB Drive or Memory Card easily, but still if you are unable to remove write protection from your drive than their might be some hardware problem or something, make sure to contact your retailer and get it replaced.

Customize Blogger Blog


scrollbarsScrollbars as you might see in every website is used to navigate and slide to other website content faster way, well you can click and drag the scrollbar and slide to the end of the website. But in all websites one thing is common that scrollbar is same and is boring. So now you can change the look of your scrollbar easily like we have done on our website, so if you are on chrome or firefox you might be watching new scrollbar working live
So now if you wanna change your scrollbars too than you can follow all the steps given below and make your scrollbar attractive too.

How to Change Scrollbars in Blogger Blog :

Well this below tutorial is for blogger blogs as its really easy to implement it in any blog, well this same tutorial can be followed for the Wordpress or any other blogs.
1. Go to Blogger.com and Sign in to your Account, now choose your blog and navigate to Template > Edit HTML.
2. Now press Ctrl + F to open the search box and search for ]]></b:skin> tag and paste the below code right above or before it.
::-webkit-scrollbar{height:14px;width:14px;background:#eee;border-left:1px solid #ddd}::-webkit-scrollbar-thumb{background:#ddd;border:1px solid #ccc}::-webkit-scrollbar-thumb:hover{border:1px solid #bbb}::-webkit-scrollbar-thumb:active{background:#ccc;border:1px solid #aaa}
3. Now hit the Save Template button and than refresh your blog to see scrollbars changed.


Hide Posts Atom, Older, Newer Posts & Home from Blogger


posts atom blogger
  1. Go to Blogger.com and Sign In to your Account.
  2. Now choose your Blog and Navigate to Template > Edit HTML.
  3. Now find out ]]></b:skin> and paste below codes right above it and click on save Template.
Remove Post Atom :
.feed-links, .blog-feeds {
display: none;
}
Remove Home Link :
.home-link {
display: none;
}
Remove Older Post Link :
.blog-pager-older-link {
display: none;
}
Remove Home & Older Post Link :
.blog-pager {
display: none;
}
Now paste any code from the following four options which you wanna hide and than enjoy those hidden links.


How to Hide or Remove Blogger Navbar Easily

blogger navbar
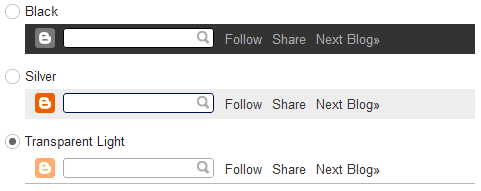
So now if you do not like this Navbar you can easily hide or remove it using a small CSS trick. Well we are just going to add a piece of line in the template which will make your Navbar vanish away. So follow the below steps on how to do it and easily hide your own.
  1. Go to Blogger.com and Sign In to your account.
  2. Now choose your blog and navigate to Template > Edit HTML.
  3. Now find ]]></b:skin> and paste the below code right above it, and click on Save Template.
#navbar-iframe{height:0px;visibility:hidden;display: none !important}
That’s it now just refresh your blog and your Navbar will be gone, totally hidden and vanished away.


How to Remove Attribution Widget on Blogger


If you're using a template by Blogger's Template Designer, most of them have an attribution widget at the bottom of the blog.

Take a look and it's something like this...
blogger attribution widget

You're able to modify only the "Copyright" statement from the widget.

If you want to remove this Attribution widget at Design > Page Elements, you see that it can be edited...
blogger attribution widget

But unlike the other normal widgets, you won't be able to remove the Attribution widget because it doesn't have a "Remove" button.
blogger attribution widget

If you insist on removing the widget, here are the steps to remove the attribution widget on Blogger. It's pretty easy and understandable.

1) First, go to Design > Edit HTML > Tick "Expand Widget Templates". Search for the word "attribution".
blogger attribution widget

2) When you see the Attribution widget code (refer to image above), change the "true" onlocked to "false".

3) Go back to Design > Page Elements.
blogger attribution widget

4) Since the lock function is disabled (by changing the code to "false"), it's movable and can be removed as well. Click on "Edit" on the Attribution element.

5) And now with the "Remove" button available, you can finally remove the Attribution widget for good.
blogger attribution widget

Done!