Showing posts with label hide. Show all posts

Friday, 20 July 2012

How To Hide Any Drive Through Command Prompt


Have you ever thought of hiding any drive from your system so that no one can knew about it. You may have heard or even used a lot of software’s that might be able to do that, but if you want to do things by your own without using any 3rd party software than this tutorial will show you how you can do it.
Well there are 3 ways of doing it, in this tutorial we are covering command prompt way of doing it.

Here is how to do it:

Step 1. Open command Prompt, go to Start Menu > All Programs >Accessories > Command prompt
Step 2. In the Command Prompt, type Diskpart and hit enter key. If UAC (User Account Control), dialog-box prompts than click Yes.
Step 3. Then type List Volume and press enter, this will produce the list of all drives.
Step 4. Now select the drive which you want to hide, you can either do this by typing Select Volume 1 (i.e. Volume Number) or by typing Select Volume C(i.e. Drive letter)
Step 5. To hide a drive, type Remove Letter C. Here, C is the drive letter than you want to hide. You can use any drive letter you want.
Step 6. That’s it. You are done! C drive is now hidden

How to unhide hidden drive

Step 1. Follow the procedure mentioned in step 1, 2, 3 and 4.
Step 2. To show the hidden drive type Assign Letter C and hit enter, now you can view C: drive in explorer.
That’s it. This is one way of hiding and un-hiding drives from explorer, for rest stay tuned.

Wednesday, 11 July 2012

Customize Blogger Blog


scrollbarsScrollbars as you might see in every website is used to navigate and slide to other website content faster way, well you can click and drag the scrollbar and slide to the end of the website. But in all websites one thing is common that scrollbar is same and is boring. So now you can change the look of your scrollbar easily like we have done on our website, so if you are on chrome or firefox you might be watching new scrollbar working live
So now if you wanna change your scrollbars too than you can follow all the steps given below and make your scrollbar attractive too.

How to Change Scrollbars in Blogger Blog :

Well this below tutorial is for blogger blogs as its really easy to implement it in any blog, well this same tutorial can be followed for the Wordpress or any other blogs.
1. Go to Blogger.com and Sign in to your Account, now choose your blog and navigate to Template > Edit HTML.
2. Now press Ctrl + F to open the search box and search for ]]></b:skin> tag and paste the below code right above or before it.
::-webkit-scrollbar{height:14px;width:14px;background:#eee;border-left:1px solid #ddd}::-webkit-scrollbar-thumb{background:#ddd;border:1px solid #ccc}::-webkit-scrollbar-thumb:hover{border:1px solid #bbb}::-webkit-scrollbar-thumb:active{background:#ccc;border:1px solid #aaa}
3. Now hit the Save Template button and than refresh your blog to see scrollbars changed.


Hide Posts Atom, Older, Newer Posts & Home from Blogger


posts atom blogger
  1. Go to Blogger.com and Sign In to your Account.
  2. Now choose your Blog and Navigate to Template > Edit HTML.
  3. Now find out ]]></b:skin> and paste below codes right above it and click on save Template.
Remove Post Atom :
.feed-links, .blog-feeds {
display: none;
}
Remove Home Link :
.home-link {
display: none;
}
Remove Older Post Link :
.blog-pager-older-link {
display: none;
}
Remove Home & Older Post Link :
.blog-pager {
display: none;
}
Now paste any code from the following four options which you wanna hide and than enjoy those hidden links.


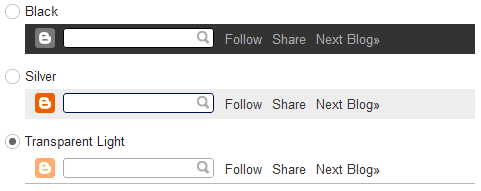
How to Hide or Remove Blogger Navbar Easily

blogger navbar
So now if you do not like this Navbar you can easily hide or remove it using a small CSS trick. Well we are just going to add a piece of line in the template which will make your Navbar vanish away. So follow the below steps on how to do it and easily hide your own.
  1. Go to Blogger.com and Sign In to your account.
  2. Now choose your blog and navigate to Template > Edit HTML.
  3. Now find ]]></b:skin> and paste the below code right above it, and click on Save Template.
#navbar-iframe{height:0px;visibility:hidden;display: none !important}
That’s it now just refresh your blog and your Navbar will be gone, totally hidden and vanished away.


How to Remove Attribution Widget on Blogger


If you're using a template by Blogger's Template Designer, most of them have an attribution widget at the bottom of the blog.

Take a look and it's something like this...
blogger attribution widget

You're able to modify only the "Copyright" statement from the widget.

If you want to remove this Attribution widget at Design > Page Elements, you see that it can be edited...
blogger attribution widget

But unlike the other normal widgets, you won't be able to remove the Attribution widget because it doesn't have a "Remove" button.
blogger attribution widget

If you insist on removing the widget, here are the steps to remove the attribution widget on Blogger. It's pretty easy and understandable.

1) First, go to Design > Edit HTML > Tick "Expand Widget Templates". Search for the word "attribution".
blogger attribution widget

2) When you see the Attribution widget code (refer to image above), change the "true" onlocked to "false".

3) Go back to Design > Page Elements.
blogger attribution widget

4) Since the lock function is disabled (by changing the code to "false"), it's movable and can be removed as well. Click on "Edit" on the Attribution element.

5) And now with the "Remove" button available, you can finally remove the Attribution widget for good.
blogger attribution widget

Done!